使用Servlet+Mybatis+Thymeleaf等框架与技术对控制台管理系统的进一步完善,使用Thymeleaf作为前端模板进行展示实现有效的前后端分离。
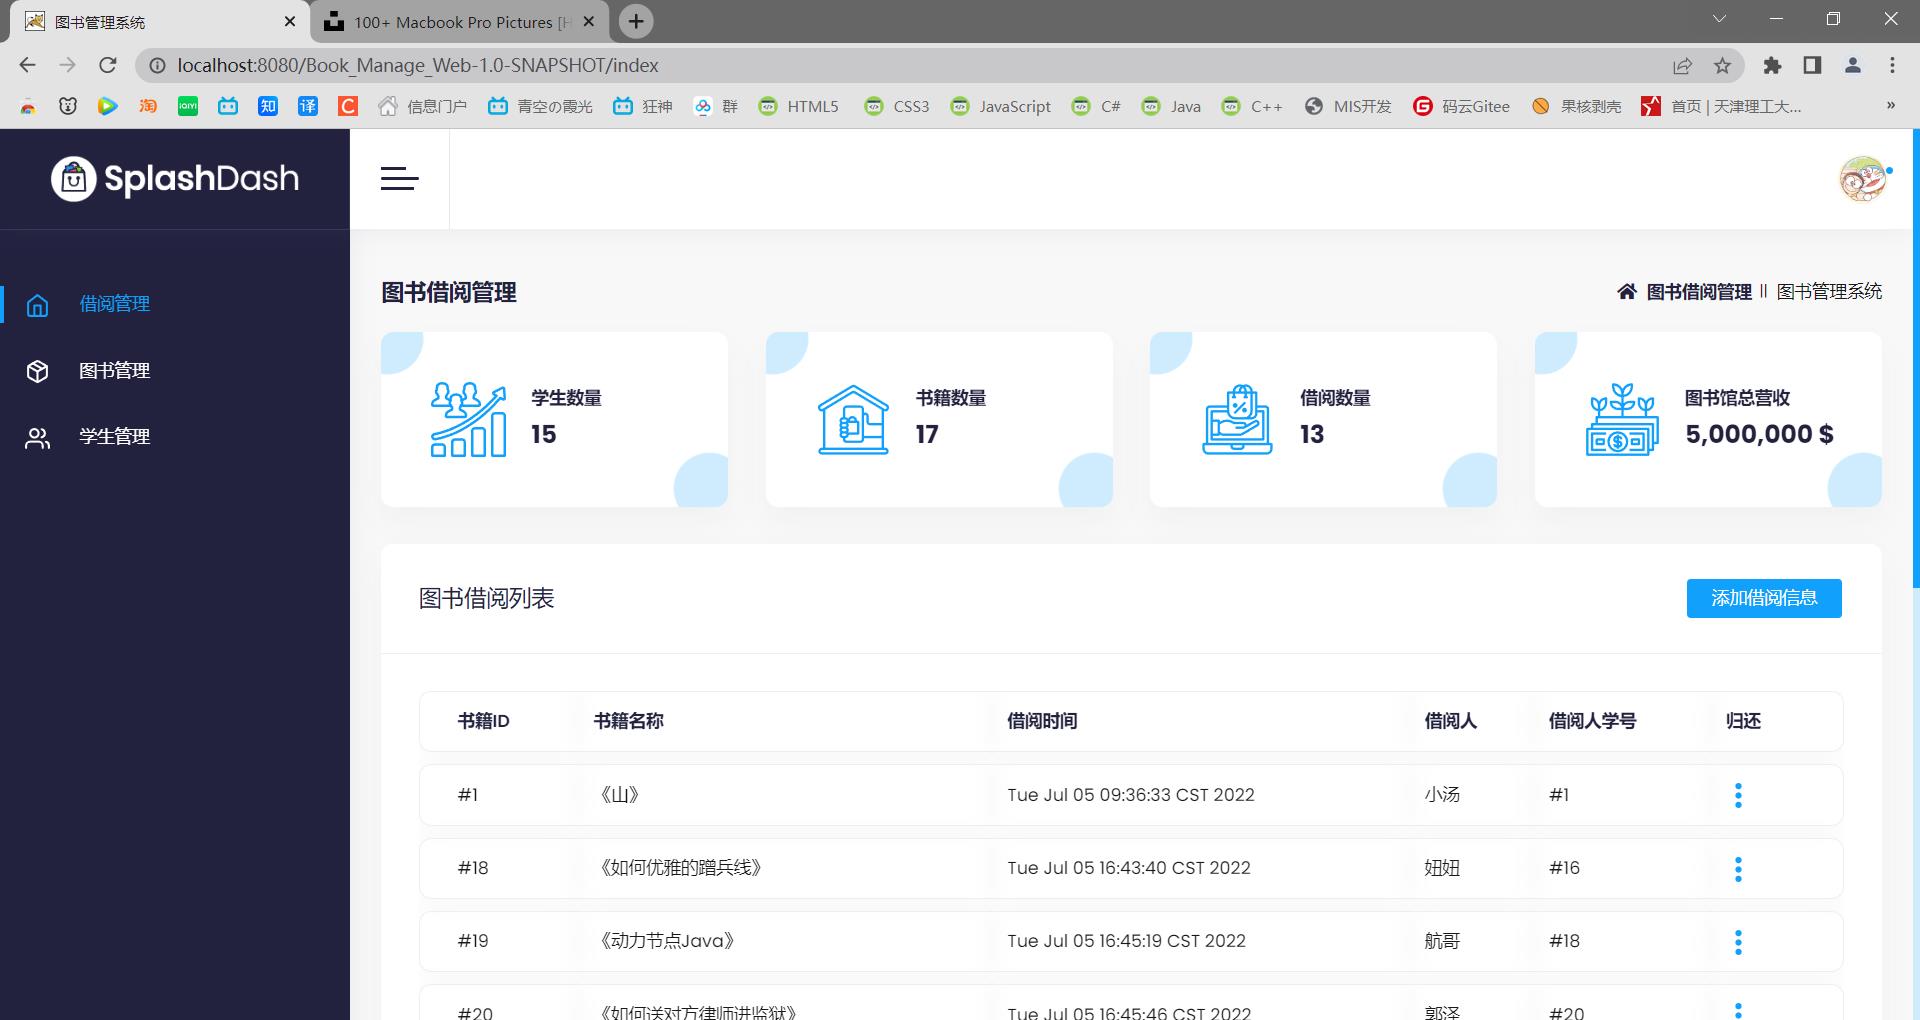
项目成果展示
项目分析 项目需求
框架结构分析 本次实战使用到的框架:Servlet+Mybatis+Thymeleaf
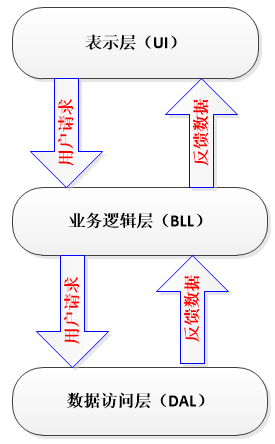
在编写的时候,为了使得整体的代码简洁高效,我们严格遵守三层架构模式:
**表示层(前端页面+Servlet)**:Servlet向service层索要数据,接收前端页面的请求(发送页面解析)与响应(上下文)
**业务逻辑层(Service+ServiceImpl)**:才是用于进行数据处理的地方。逻辑层通过mapper索要数据,向servlet反应数据。
数据访问层(Mybatis+mapper) :数据访问层向下管数据库索要数据,向上为Service提供接口方法。
实体类 :实体类贯穿三大层次,将数据封装在实体类中,以便于数据在三层架构中进行数据传递。
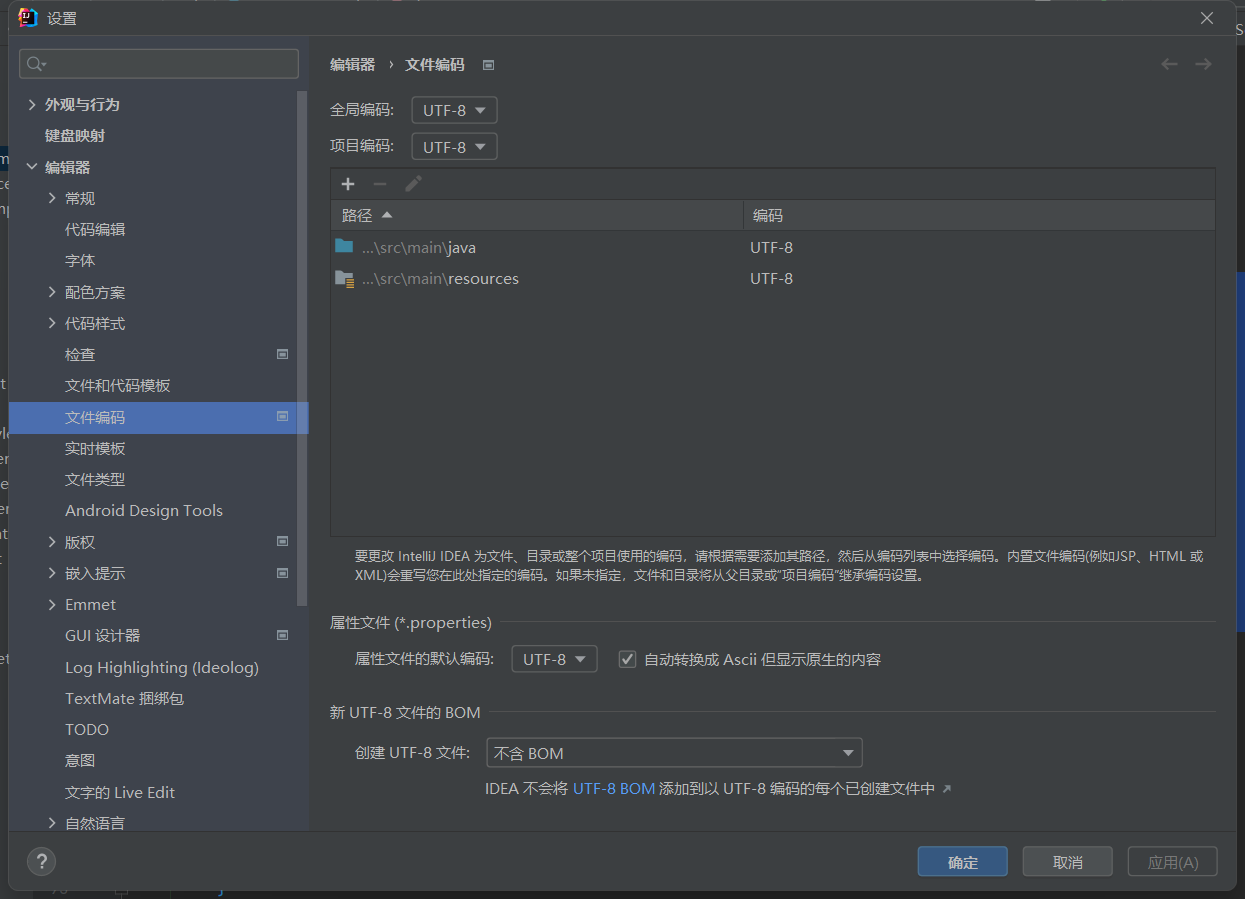
关于Thymeleaf 使用Thymeleaf可以有效地避免前后端耦合的情况,不过由于并没有Spring配置文件可以调整Thymeleaf的编码,项目的编码问题一直都在servlet和html中进行调配解决,在全局项目和当前项目都设置为utf-8之后,将html(thymeleaf编码设置为gbk),并在servlet需要的方法中(doGet或者doPost中进行编码设置)可以使中文不会乱码。
前端模板如下:
SplashDash.7z
Login页面的搭建以及相关配置 此处进行数据库表格的搭建、创建项目环境、进行Login页面的简单进入。
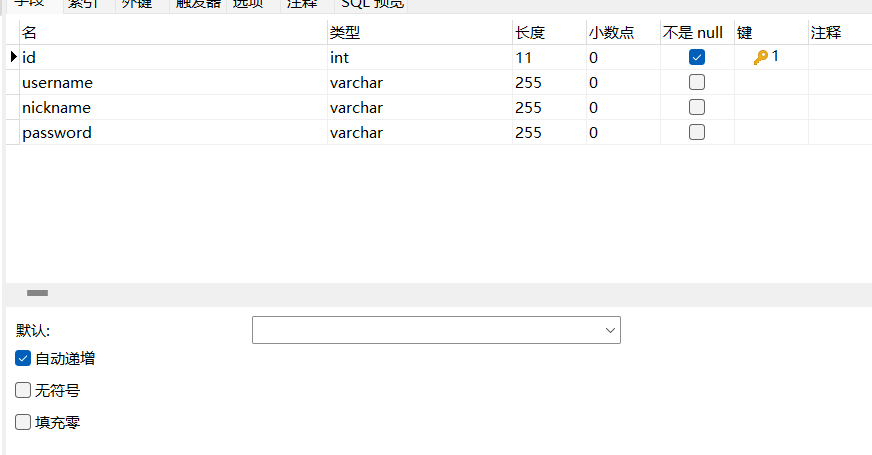
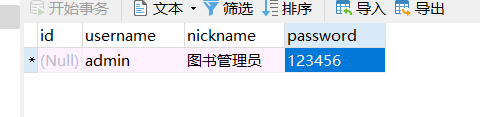
数据库 创建admin表并插入数据
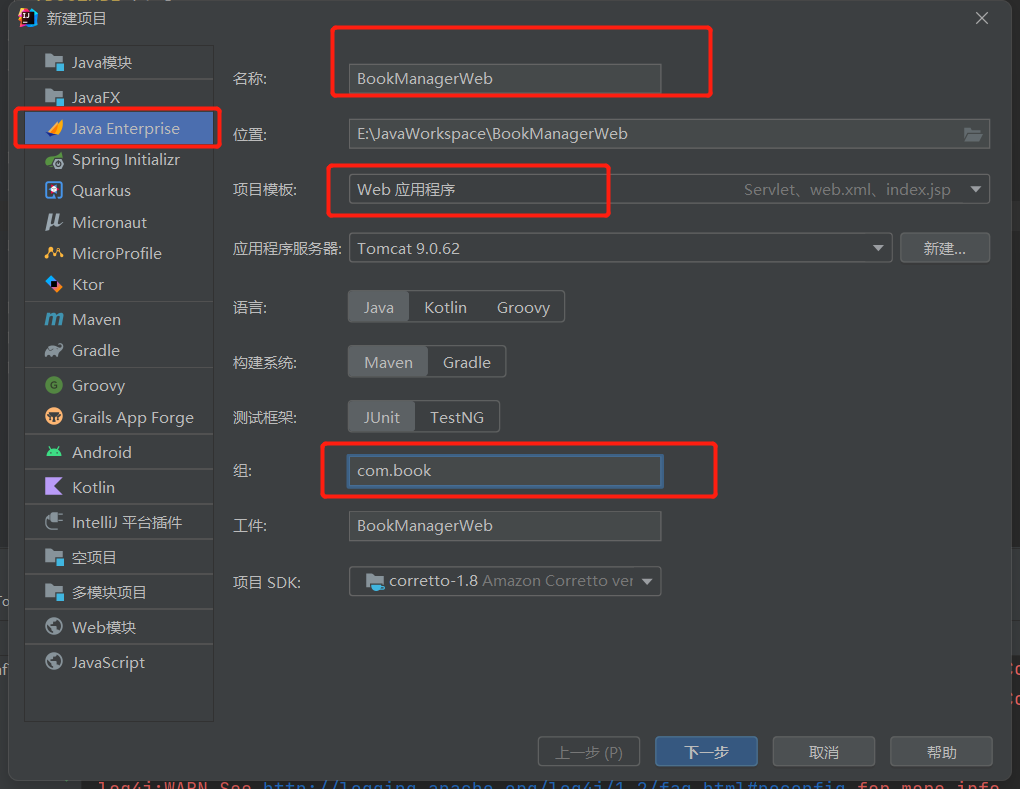
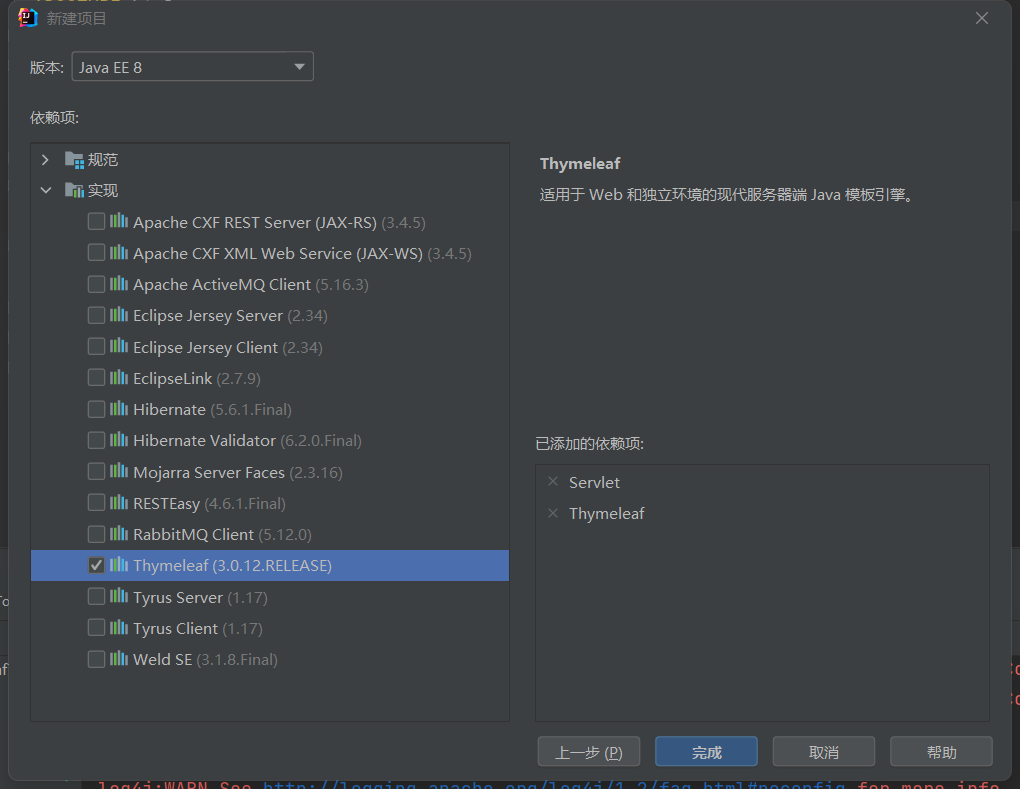
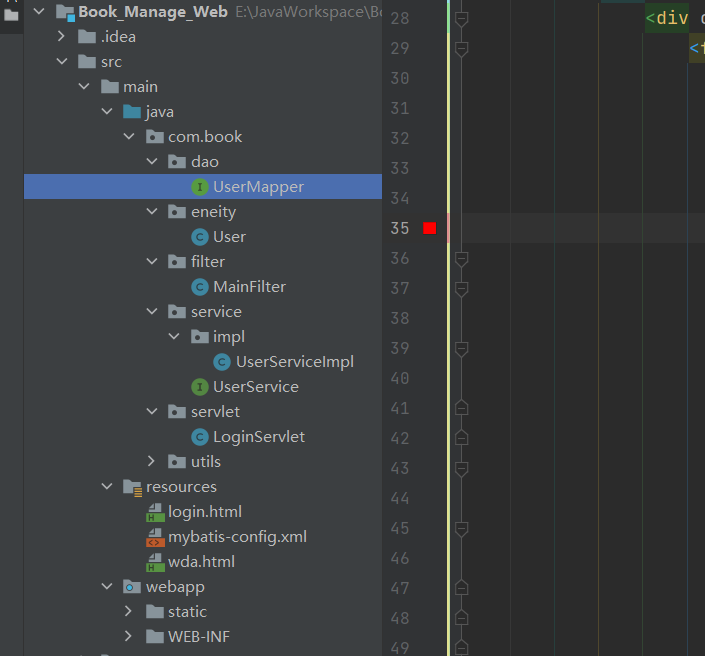
新建项目BookManagerWeb
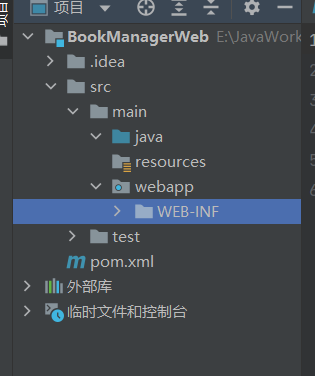
清空自带的文件
添加Maven依赖和插件 ①如果是Tomcat10以上的版本要修改servlet
②添加lombok,junit5,jdbc,mybaits
1 2 3 4 5 6 7 8 9 10 11 12 13 14 15 16 17 18 19 20 21 22 <dependency > <groupId > org.projectlombok</groupId > <artifactId > lombok</artifactId > <version > 1.18.22</version > <scope > provided</scope > </dependency > <dependency > <groupId > mysql</groupId > <artifactId > mysql-connector-java</artifactId > <version > 8.0.27</version > </dependency > <dependency > <groupId > org.mybatis</groupId > <artifactId > mybatis</artifactId > <version > 3.5.7</version > </dependency >
③Maven构建
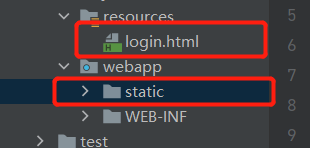
导入login页面和static资源 加上thymeleaf约束
1 xmlns:th="http://www.thymeleaf.org"
问题:为什么login.html文件放在resources文件夹?
答案:因为login页面需要被Thymeleaf进行动态解析
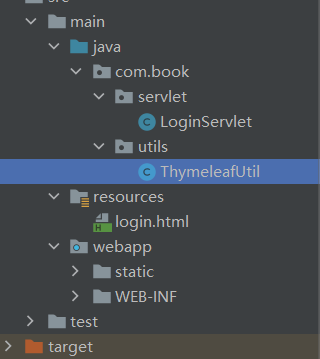
创建Servlet文件夹以及LoginServlet
1
2
3
4
5
6
7
8
9
@WebFilter("/login") public class LoginServlet extends HttpServlet {@Override protected void doGet (HttpServletRequest req, HttpServletResponse resp) throws ServletException, IOException {"login.html" ,new Context (),resp.getWriter());
修改Tomcat默认url和部署路径
创建工具类文件夹以及Thymeleaf工具类 对调用的工具类方法进行优化
原代码
1
2
3
4
5
6
7
8
9
10
11
12
13
public class ThymeleafUtil {private static final TemplateEngine engine;static {new TemplateEngine ();ClassLoaderTemplateResolver r = new ClassLoaderTemplateResolver ();public static TemplateEngine getEngine () {return engine;
优化后节省了传值的过程
1
2
3
4
5
6
7
8
9
10
11
12
public class ThymeleafUtil {private static final TemplateEngine engine;static {new TemplateEngine ();ClassLoaderTemplateResolver r = new ClassLoaderTemplateResolver ();public static void process (String template, IContext context, Writer writer) {
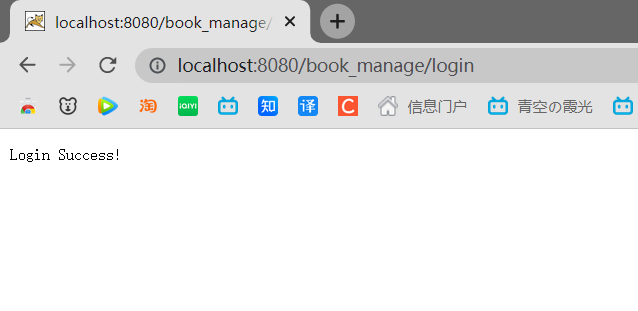
进行运行试验
报错:至少有一个JAR被扫描用于TLD但尚未包含TLD。一个或多个筛选器启动失败
解决:@WebServlet错写成了@WebFilter,改回去就好了(查了三小时,裂开)
成功的Servlet
1
2
3
4
5
6
7
8
9
10
11
12
13
@WebServlet("/login") public class LoginServlet extends HttpServlet {@Override protected void doGet (HttpServletRequest req, HttpServletResponse resp) throws ServletException, IOException {Context context = new Context ();"utf-8" );"utf-8" );"text/html;charset=utf-8" );"login.html" , context, resp.getWriter());
失败的Servlet
1
2
3
4
5
6
7
8
@WebFilter("/login") public class LoginServlet extends HttpServlet {@Override protected void doGet (HttpServletRequest req, HttpServletResponse resp) throws ServletException, IOException {"login.html" ,new Context (),resp.getWriter());
登陆权限的设置 在此处我们要设置登陆权限的控制(验证身份)。在设置了全局过滤器的情况下,只能通过提交用户密码进行登录。对表单中的数据进行收集,通过doPost方法进行提交之后,servlet调用ServiceImpl方法进行验证,如果true则输出LoginSuccess。ServiceImpl属于实现Service,Service调用Mapper中的方法,Mapper链接Mybatis可以对数据库进行操作。
设置Servlet字符编码 html不设置gbk会出现中文乱码,Servlet不设置req resp为utf-8会显示问号
1 2 3 4 "utf-8" );"utf-8" );"text/html;charset=utf-8" );
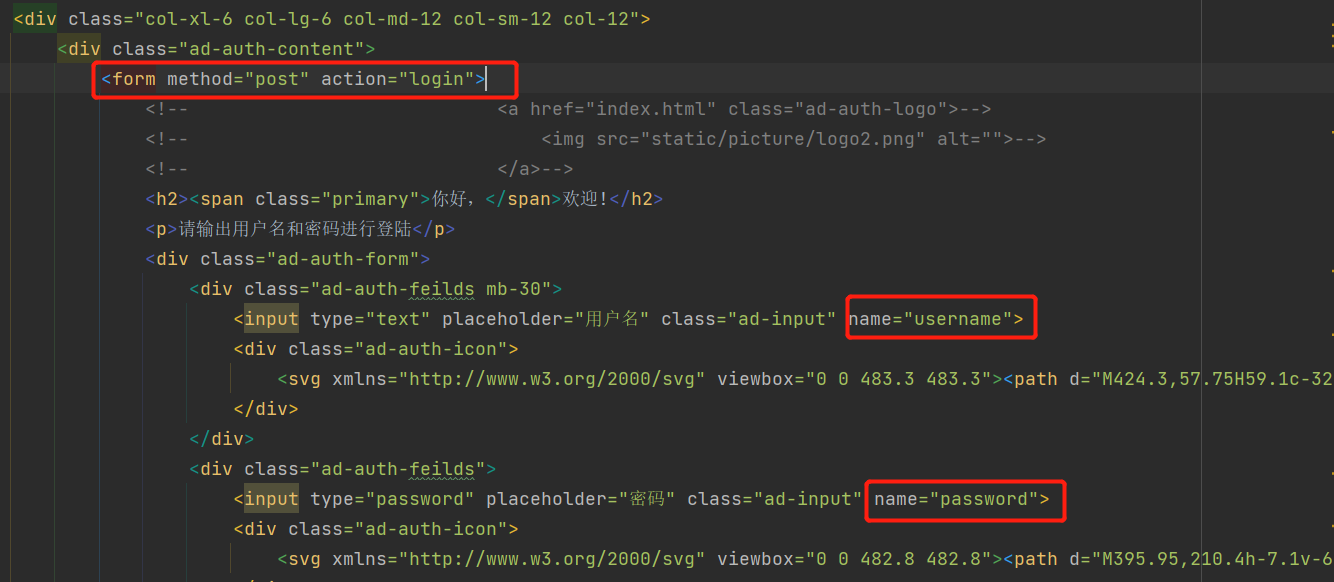
设置表单和LoginServlet的doPOST 给Form加上method action 修改username password remember-me button
给username和password加上name
1 <button class ="ad-btn ad-login-member" > 登录</button >
doPost
1
2
3
4
@Override protected void doPost (HttpServletRequest req, HttpServletResponse resp) throws ServletException, IOException {
先设置过滤器 ①可以让你访问静态资源
②不是静态资源就要验证登录
1
2
3
4
5
6
7
8
9
10
11
12
13
14
15
@WebFilter("/*") public class MainFilter extends HttpFilter {@Override protected void doFilter (HttpServletRequest req, HttpServletResponse res, FilterChain chain) throws IOException, ServletException {String url = req.getRequestURL().toString();if (!url.contains("/static/" )&&!url.endsWith("login" )){
设置User实体类 以进行数值查询与比对
1
2
3
4
5
6
7
@Data public class User {int id;
完善Filter中的判断语句 1 2 3 4 5 6 7 8 9 10 11 if (!url.contains("/static/" )&&!url.endsWith("login" )){HttpSession session = req.getSession();User user = (User) session.getAttribute("user" );if (user == null && !url.endsWith("login" )){"login" );return ;
此验证的是登录成功之后,LoginServlet给你的user值,主要对比数据库还是在LoginServlet中
问题:为什么允许静态变量进行访问呢?
答:因为主页的一些js,css都是属于静态变量中的一个部分。不允许访问主页会显示乱码。
配置Mybatis 1 2 3 4 5 6 7 8 9 10 11 12 13 14 15 16 17 18 19 20 <?xml version="1.0" encoding="UTF-8" ?> <!DOCTYPE configuration PUBLIC "-//mybatis.org//DTD Config 3.0//EN" "http://mybatis.org/dtd/mybatis-3-config.dtd" > <configuration > <environments default ="development" > <environment id ="development" > <transactionManager type ="JDBC" /> <dataSource type ="POOLED" > <property name ="driver" value ="com.mysql.cj.jdbc.Driver" /> <property name ="url" value ="jdbc:mysql://localhost:3306/book_manage" /> <property name ="username" value ="root" /> <property name ="password" value ="123456" /> </dataSource > </environment > </environments > <mappers > <package name = "com.book.dao" /> </mappers > </configuration >
配置了Mybatis当然要写Mapper接口(操作数据库的这一层) 1 2 3 4 5 6 public interface UserMapper {@Select("select * from admin where username = #{username} and password = #{password}") getUser (@Param("username") String username,@Param("password") String password) ;
Mybatis工具类 1 2 3 4 5 6 7 8 9 10 11 12 13 public class MybatisUtil {private static SqlSessionFactory factory;static {try {new SqlSessionFactoryBuilder ().build(Resources.getResourceAsReader("mybatis-config.xml" ));catch (IOException e) {public static SqlSession getSession () {return factory.openSession(true );
业务逻辑层Service (用于判断数据库中有没有用户名加密码,如果有就丢一个Session,原来是在Servlet,详情查看WebTest项目)
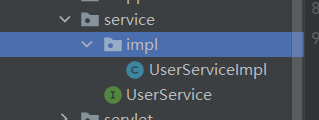
写UserService接口,在impl(implement实现)里面写上接口的实现类
我们验证结束后丢给Session,丢个User对象
1 2 3 4 5 6 public interface UserService {boolean auth (String username, String password, HttpSession session) ;
1 2 3 4 5 6 7 8 9 10 11 12 13 14 15 16 17 public class UserServiceImpl implements UserService {@Override public boolean auth (String username, String password, HttpSession session) {try (SqlSession sqlsession = MybatisUtil.getSession()){UserMapper mapper = sqlsession.getMapper(UserMapper.class);User user = mapper.getUser(username,password);if (user == null ){return false ;else {"user" ,user);return true ;
LoginServlet的init和Post完善 对表单提交,以及登陆错误显示失败的逻辑进行完善
1 2 3 4 5 6 7 8 9 10 11 12 13 14 15 16 17 18 19 20 21 22 23 24 25 26 27 28 29 30 31 32 33 34 35 36 @WebServlet("/login") public class LoginServlet extends HttpServlet {@Override public void init () throws ServletException {new UserServiceImpl ();@Override protected void doGet (HttpServletRequest req, HttpServletResponse resp) throws ServletException, IOException {"utf-8" );"utf-8" );"text/html;charset=utf-8" );Context context = new Context ();if (req.getSession().getAttribute("login-failure" )!=null ){"failure" ,true );"login-failure" );"login.html" ,context,resp.getWriter());@Override protected void doPost (HttpServletRequest req, HttpServletResponse resp) throws ServletException, IOException {String username = req.getParameter("username" );String password = req.getParameter("password" );String remember = req.getParameter("remember" );if (service.auth(username,password,req.getSession())){"Login Success!" );else {"login-failure" ,new Object ());this .doGet(req,resp);
在Login.html加上if判断 1 2 <p th:unless ="${failure}" > 请输出用户名和密码进行登陆</p > <p th:if ="${failure}" style ="color:red" > 您的用户名或密码输入不正确</p >
将Mapper文件加改名成了dao 登录测试
报错:点了登录键没有效果
答:登录键没有改成button,并且设置了JavaScript:void(0);意思是不让人点。
改成
流程回顾 ①用户输入的数据通过前端表单,到Servlet的doPost,使用Service的方法,Service使用Mapper定义的映射规则进行查询user对象,返回一个true或者false  
其他主要页面的搭建+退出功能 配置了其他页面的前端链接并对对应的链接编写了Servlet与之对应,并添加了退出逻辑。之前登录的之后,之所以可以全局页面进行浏览就是因为我们的请求中携带了session在Cookie中,退出逻辑正是对session进行清除并对主页进行重定向,所有的页面访问都会一并消失。
添加页面测试 插入index.html(框架支持和gbk)
IndexServlet以及doGet
1 2 3 4 5 6 7 8 9 10 11 12 13 14 15 16 17 18 @WebServlet("/index") public class IndexServlet extends HttpServlet {@Override protected void doGet (HttpServletRequest req, HttpServletResponse resp) throws ServletException, IOException {"utf-8" );"utf-8" );"text/html;charset=utf-8" );Context context = new Context ();User user = (User) req.getSession().getAttribute("user" );"nickname" ,user.getNickname());"index.html" ,context,resp.getWriter());
登陆成功(Login-doPost)直接重定向,已经登陆的(Login-doGet)请求登陆页面也重定向
1 2 3 4 5 6 7 8 9 10 11 12 13 14 15 16 17 @Override protected void doPost (HttpServletRequest req, HttpServletResponse resp) throws ServletException, IOException {String username = req.getParameter("username" );String password = req.getParameter("password" );String remember = req.getParameter("remember-me" );if (service.auth(username,password,req.getSession())){"index" );else {"login-failure" ,new Object ());this .doGet(req,resp);
进行测试是否可以正常打开
报错:加了页面之后还是没有,报错500
解决:可以通过Maven-clean解决,如果clean之后还是报错再看程序问题
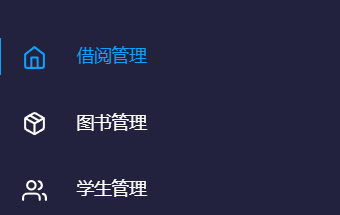
左侧面板设计 借阅信息(index)
图书列表浏览(books)
学生列表(students)
退出登录操作 新建LogoutServlet,顺便整理Servlet包为不同的Servlet进行随意分类
如果有人想退出就请求logout,链接到LogoutServlet,servlet负责清除session以及重定向到主页
1 2 3 4 5 6 7 8 9 10 11 12 @WebServlet("/logout") public class LogoutServlet extends HttpServlet {@Override protected void doGet (HttpServletRequest req, HttpServletResponse resp) throws ServletException, IOException {"user" );"login" );
index页面修改 删除不要的东西(收缩)
对应修改的内容放在Thymeleaf-doGet里面做替换
删除后可以建立Thymeleaf模板header.html,创建链接,主页面进行使用
1 <header class ="header-wrapper main-header" th:fragment ="title" >
对应的模板使用
1 2 <div th:replace ="header.html::title" > </div >
添加Students和Books页面 简单配置好两个页面的html文件(从index复制过来进行修改)和对应的Servlet文件(对页面的主体内容进行修改)
1 2 3 4 5 6 7 8 9 10 11 12 13 14 15 16 @WebServlet("/books") public class BookServlet extends HttpServlet {@Override protected void doGet (HttpServletRequest req, HttpServletResponse resp) throws ServletException, IOException {"utf-8" );"utf-8" );"text/html;charset=utf-8" );Context context = new Context ();"books.html" ,context,resp.getWriter());
1 2 3 4 5 6 7 8 9 10 11 12 13 14 15 16 17 @WebServlet("/students") public class StudentServlet extends HttpServlet {@Override protected void doGet (HttpServletRequest req, HttpServletResponse resp) throws ServletException, IOException {"utf-8" );"utf-8" );"text/html;charset=utf-8" );Context context = new Context ();"students.html" ,context,resp.getWriter());
进行测试
报错:BookServlet中的url链接错误
解决:原因是Book中的@WebServlet(“”)中的book前没加斜杠
查询借阅信息 思路 我们要在删除和添加操作前面做查询操作,因为添加和删除操作没有设置返回值,成功与否都是查询进行反馈。首先实现的是借阅的信息,借阅信息通过mapper的联查语句对数据库进行操作(小知识,联查语句可以提前在可视化工具进行实验,避免之后发生问题),与添加和删除不同的是,查询运用到了集合类,将serviceimpl查到的结果列表整个返回给Servlet,Servlet也将整个列表返回给Thymeleaf,因为Thymeleaf可以自己解析列表,通过前端语句进行输出。
Mapper按包注册 修改mybatis的mapper注册,修改为一个包
1 2 3 4 5 <mappers > <package name = "com.book.dao" /> </mappers >
Borrow实体类 创建borrow实体类
1 2 3 4 5 6 7 8 9 10 11 @Data public class Borrow {int id;int book_id;int student_id;
BookService 书写接口方法等待ServiceImpl去进行实现
1 2 3 4 5 6 public interface BookService {getBorrorList () ;
BookServiceImpl ServiceImpl每实现一个方法都要先创建sqlsession数据库连接对象
1 2 3 4 5 6 7 8 9 10 11 12 13 public class BookServiceImpl implements BookService {@Override public List<Borrow> getBorrorList () {try (SqlSession sqlsession = MybatisUtil.getSession()){BookMapper mapper = sqlsession.getMapper(BookMapper.class);return mapper.getBorrowList();
BookMapper 1 2 3 4 5 6 7 8 9 10 11 12 13 14 15 public interface BookMapper {@Results({ @Result(column = "id",property = "id"), @Result(column = "bid",property = "book_id"), @Result(column = "title",property = "book_name"), @Result(column = "time",property = "time"), @Result(column = "name",property = "student_name"), @Result(column = "sid",property = "student_id") }) @Select("select * from borrow,student,book where borrow.bid = book.bid and borrow.sid = student.sid") getBorrowList () ;
IndexServlet 1 2 3 4 5 6 7 8 9 10 11 12 13 14 15 16 17 18 19 20 21 22 23 24 25 26 @WebServlet("/index") public class IndexServlet extends HttpServlet {@Override public void init () throws ServletException {new BookServiceImpl ();@Override protected void doGet (HttpServletRequest req, HttpServletResponse resp) throws ServletException, IOException {"utf-8" );"utf-8" );"text/html;charset=utf-8" );Context context = new Context ();User user = (User) req.getSession().getAttribute("user" );"nickname" ,user.getNickname());"borrow_list" ,service.getBorrorList());"index.html" ,context,resp.getWriter());
index.html Servlet将整个列表返回给前端页面,通过前端的each循环进行对应展示
1 2 3 4 5 6 7 8 <tr th:each = "borrow:${borrow_list}" > <td th:text ="'#'+${borrow.getBook_id()}" > 我是ID</td > <td th:text ="${borrow.getBook_name()}" > 我是书名</td > <td th:text ="${borrow.getTime()}" > 22/06/2021</td > <td th:text ="${borrow.getStudent_name()}" > 我是借阅人</td > <td th:text ="'#'+${borrow.getStudent_id()}" > 20191701</td >
归还操作 思路 归还操作类似后面的删除书籍、学生操作。在点击归还按钮之后,前端带着有id的doPost请求向Servlet进行申请。Servlet将ID转化为int形式然后传到Service,Service执行mapper中定义的删除方法。
index.html 点击归还操作后带着id提交申请到对应servlet
1 2 <td class ="relative" > <a class ="action-btn " th:href ="'return-book?id='+${borrow.getId()}" >
ReturnServlet 1 2 3 4 5 6 7 8 9 10 11 12 13 14 15 16 17 18 19 20 21 22 23 @WebServlet("/return-book") public class ReturnServlet extends HttpServlet {@Override public void init () throws ServletException {new BookServiceImpl ();@Override protected void doGet (HttpServletRequest req, HttpServletResponse resp) throws ServletException, IOException {"utf-8" );"utf-8" );"text/html;charset=utf-8" );String id = req.getParameter("id" );"index" );
BookService 1 2 3 4 public interface BookService {getBorrorList () ;void returnBook (String id) ;
BookServiceImpl 1 2 3 4 5 6 7 8 9 @Override public void returnBook (String id) {try (SqlSession sqlsession = MybatisUtil.getSession()){BookMapper mapper = sqlsession.getMapper(BookMapper.class);
BookMapper 1 2 3 4 5 6 7 8 9 10 11 12 13 14 15 16 public interface BookMapper {@Results({ @Result(column = "id",property = "id"), @Result(column = "bid",property = "book_id"), @Result(column = "title",property = "book_name"), @Result(column = "time",property = "time"), @Result(column = "name",property = "student_name"), @Result(column = "sid",property = "student_id") }) @Select("select * from borrow,student,book where borrow.bid = book.bid and borrow.sid = student.sid") getBorrowList () ;@Delete("delete from borrow where id = #{id}") void deleteBorrow (String id) ;
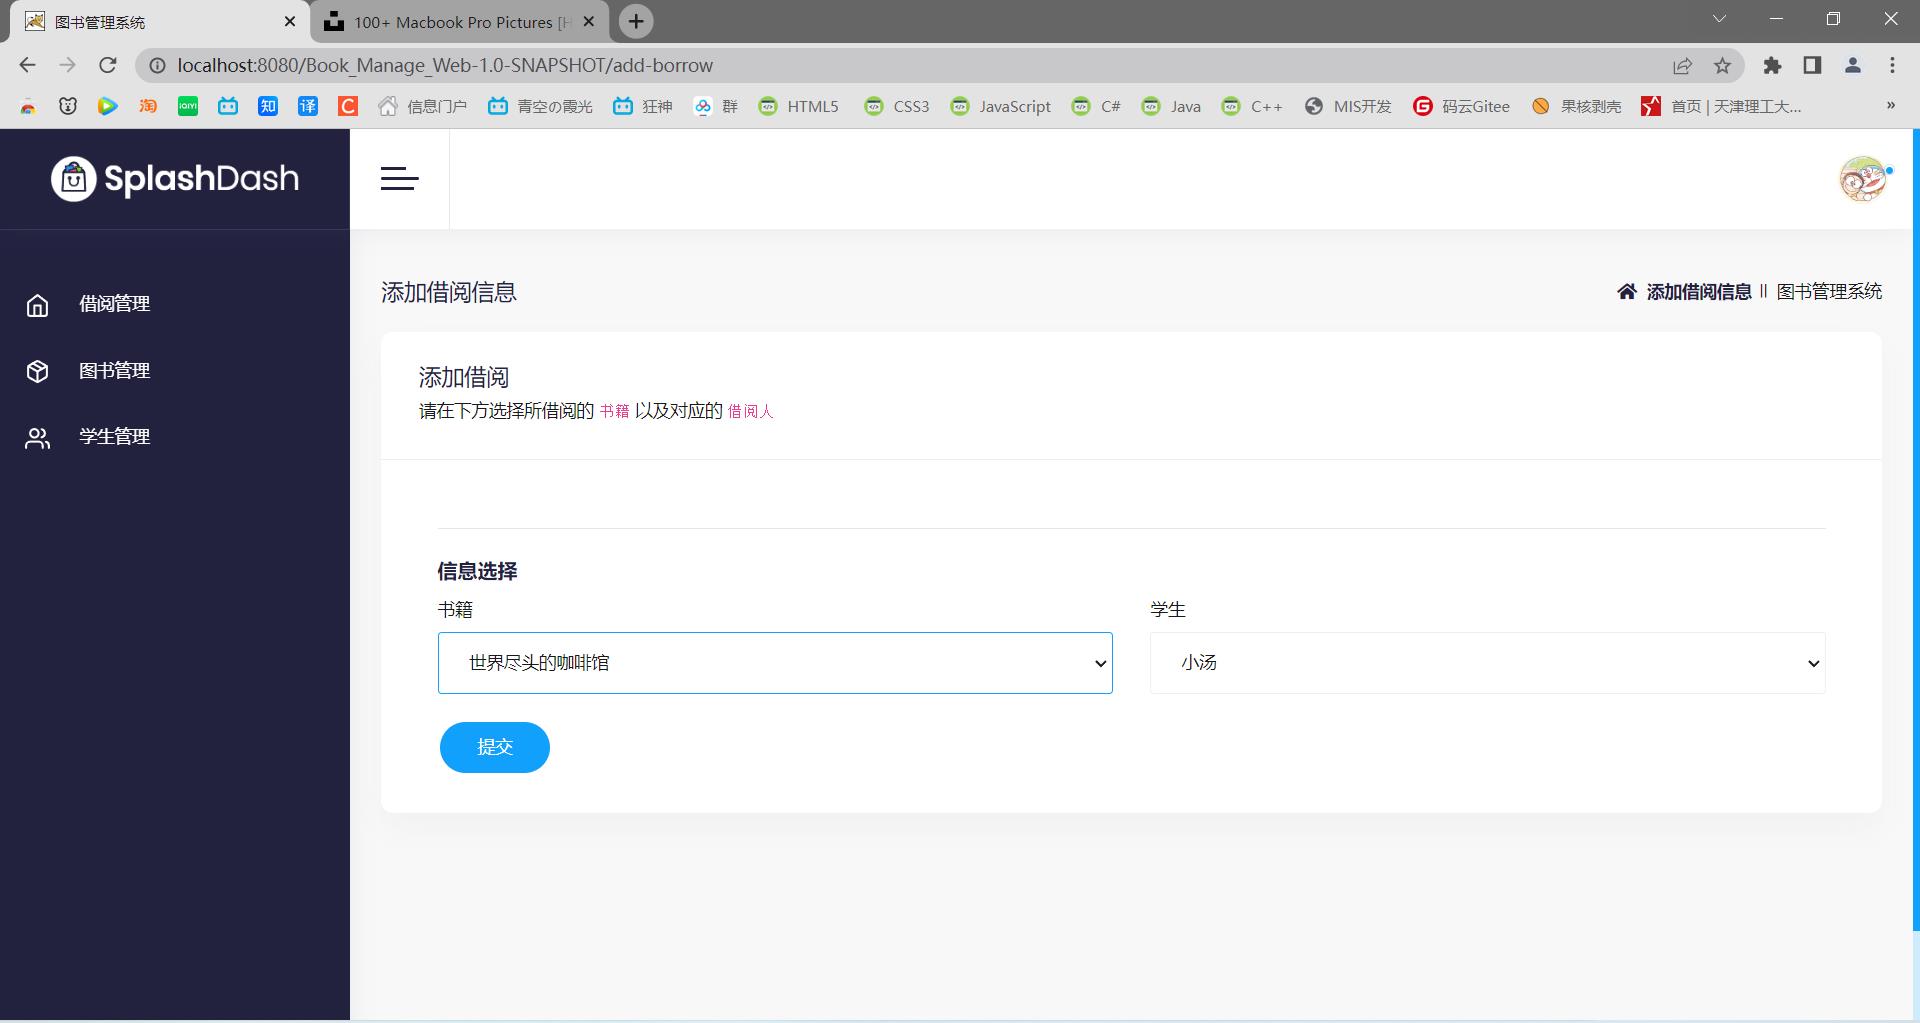
添加借阅信息 说明 发送请求进行跳转的方法:
单个使用html链接的方式进行直接的链接跳转
1 <a type ="button" href ="add-borrow" class ="btn btn-primary squer-btn sm-btn" > 添加借阅信息</a >
如果是表单的话使用button(submit)+form(action和method)+name(每个属性有对应名字)
添加借阅信息首先只能显示可以外借的图书,就要在列表中删除已经外借的书。为加强逻辑层的理解,我们将本应放在mapper层的图书筛选放到了Service层。
Get部分:我们点击href按钮进入doGet的addBorrow界面,mapper查到的是全部的书,service层将全部的书中已经借阅的部分按照id进行删除,返回剩余部分的列表返回给Servlet,前端通过select+option的each方法进行选择。学生部分逻辑相似只不过没有筛选部分相对简单。
Post部分:表单数据传到Servlet,Servlet将表单转换成数据。编写Mapper中的添加规则,Service浅浅实现,Impl具体实现。Servlet调用添加书籍的方法,重定向到index。
添加书籍和添加学生的逻辑类似,只不过要在doPost方法中进行文件编码转化。
Get部分 前端部分
1 2 3 4 5 6 <div class ="form-group" > <label for ="region" class ="col-form-label" > 书籍</label > <select class ="select2 form-control" id ="region" name ="book" > <option th:value ="${book.getBid()}" th:each ="book : ${book_list}" th:text ="${book.getTitle()}" > Hawaii</option > </select > </div >
Servlet部分
1 2 3 4 5 6 7 8 9 10 11 12 13 14 15 16 @Override protected void doGet (HttpServletRequest req, HttpServletResponse resp) throws ServletException, IOException {"utf-8" );"utf-8" );"text/html;charset=utf-8" );Context context = new Context ();"book_list" ,service.getActiveBookList());"student_list" ,service.getStudentList());"add-borrow.html" ,context,resp.getWriter());
Service部分
1 2 3 4 5 getActiveBookList () ;getStudentList () ;
ServiceImpl部分
1 2 3 4 5 6 7 8 9 10 11 12 13 14 15 16 17 18 19 20 21 22 23 24 25 26 27 @Override public List<Book> getActiveBookList () {new HashSet ();this .getBorrorList().forEach(borrow -> set.add(borrow.getBook_id()));try (SqlSession sqlsession = MybatisUtil.getSession()){BookMapper mapper = sqlsession.getMapper(BookMapper.class);return mapper.getBookList()@Override public List<Student> getStudentList () {try (SqlSession sqlsession = MybatisUtil.getSession()){BookMapper mapper = sqlsession.getMapper(BookMapper.class);return mapper.getStudentList();
mapper部分
1 2 3 4 5 6 7 8 @Select("select * from book") getBookList () ;@Select("select * from student") getStudentList () ;
Post部分 前端部分的name,form和button的配置每一项都缺一不可
1 2 3 4 5 6 7 8 9 10 11 12 13 14 15 16 17 18 19 20 21 22 23 24 25 26 27 <form class ="separate-form" method ="post" action ="add-borrow" > <div class ="col-xl-12 col-lg-12 col-md-12 col-sm-12 col-12" > <hr class ="mt-4 mb-4" > <h5 class ="from-title mb-1" > 信息选择</h5 > <div class ="row" > <div class ="col-xl-6 col-lg-6 col-md-12 col-sm-12 col-12" > <div class ="form-group" > <label for ="region" class ="col-form-label" > 书籍</label > <select class ="select2 form-control" id ="region" name ="book" > <option th:value ="${book.getBid()}" th:each ="book : ${book_list}" th:text ="${book.getTitle()}" > Hawaii</option > </select > </div > </div > <div class ="col-xl-6 col-lg-6 col-md-12 col-sm-12 col-12" > <div class ="form-group" > <label for ="city" class ="col-form-label" > 学生</label > <select class ="select2 form-control" id ="city" name ="student" > <option th:value ="${student.getSid()}" th:text ="${student.getName()}" th:each ="student : ${student_list}" > Alaska</option > </select > </div > </div > </div > <div class ="form-group mb-0" > <button class ="btn btn-primary" type ="submit" > 提交</button > </div > </div > </form >
Servlet部分
1 2 3 4 5 6 7 8 9 @Override protected void doPost (HttpServletRequest req, HttpServletResponse resp) throws ServletException, IOException {int sid = Integer.parseInt(req.getParameter("student" ));int bid = Integer.parseInt(req.getParameter("book" ));"index" );
Service部分
1 2 void addBorrow (int sid,int bid) ;
ServiceImpl部分
1 2 3 4 5 6 7 8 9 @Override public void addBorrow (int sid, int bid) {try (SqlSession sqlsession = MybatisUtil.getSession()){BookMapper mapper = sqlsession.getMapper(BookMapper.class);
mapper部分
1 2 3 @Insert("insert into borrow(sid,bid,time) values(#{sid},#{bid},NOW())") void addBorrow (@Param("sid") int sid,@Param("bid") int bid) ;
书籍页面 思路 书籍页面主要进行的操作有显示书籍(查询列表),添加书籍和删除书籍。
添加书籍和前面的添加借阅信息类似,只不过针对要手动输入汉字,汉字再传入Servlet的情况,我们要在doPost方法中加入编码调整。前端是按钮转到链接,提交表单,Servlet,调用Service方法,Service调用mapper进行查询。
删除书籍也是点击按钮进行链接操作,删除之后再进行重定向。
主要进行的就是查询书籍操作,查询书籍要显示书籍的借阅状态,
显示书籍(doGet) Html(对书籍的状态进行了if选择语句)
1 2 3 4 5 6 7 8 9 10 11 12 13 14 15 16 17 18 19 20 21 22 23 24 25 26 27 28 29 30 31 32 33 34 35 36 37 <thead > <tr > <th > 书籍ID</th > <th > 书籍标题</th > <th > 书籍简介</th > <th > 书籍价格</th > <th > 借阅状态</th > <th > 删除书籍</th > </tr > </thead > <tbody > <tr th:each ="book,iterStat: ${book_list}" > <td th:text ="'#'+${book.getBid}" > #JH2033</td > <td th:text ="'《'+${book.getTitle()}+'》'" > #JH2033</td > <td th:text ="${book.getDesc()}" > 22/06/2021</td > <td th:text ="'¥'+${book.getPrice()}" > $600</td > <td > <label class ="mb-0 badge badge-primary" title ="" data-original-title ="Pending" th:if ="${book_list_status.get(iterStat.index)}" > 正在借阅</label > <label class ="mb-0 badge badge-success" title ="" data-original-title ="Pending" th:unless ="${book_list_status.get(iterStat.index)}" > 可借阅</label > </td > <td class ="relative" > <a class ="action-btn " th:href ="'delete-book?bid='+${book.getBid()}" > <svg class ="default-size " viewBox ="0 0 341.333 341.333 " > <g > <g > <g > <path d ="M170.667,85.333c23.573,0,42.667-19.093,42.667-42.667C213.333,19.093,194.24,0,170.667,0S128,19.093,128,42.667 C128,66.24,147.093,85.333,170.667,85.333z " > </path > <path d ="M170.667,128C147.093,128,128,147.093,128,170.667s19.093,42.667,42.667,42.667s42.667-19.093,42.667-42.667 S194.24,128,170.667,128z " > </path > <path d ="M170.667,256C147.093,256,128,275.093,128,298.667c0,23.573,19.093,42.667,42.667,42.667s42.667-19.093,42.667-42.667 C213.333,275.093,194.24,256,170.667,256z " > </path > </g > </g > </g > </svg > </a > </td > </tr > </tbody >
Servlet
1 2 3 4 5 6 7 8 9 10 11 12 13 14 15 16 17 18 19 20 21 22 23 @Override public void init () throws ServletException {new BookServiceImpl ();@Override protected void doGet (HttpServletRequest req, HttpServletResponse resp) throws ServletException, IOException {"utf-8" );"utf-8" );"text/html;charset=utf-8" );Context context = new Context ();User user = (User) req.getSession().getAttribute("user" );"nickname" ,user.getNickname());"book_list" ,service.getBookList().keySet());"book_list_status" ,new ArrayList <>(service.getBookList().values()));"books.html" ,context,resp.getWriter());
Service
在定义时key代表列表,value代表是否借阅中,所以,进而传到Servlet中时可以直接使用。
1 2 3 4 "book_list" ,service.getBookList().keySet());"book_list_status" ,new ArrayList <>(service.getBookList().values()));
ServiceImpl
1 2 3 4 5 6 7 8 9 10 11 12 13 @Override public Map<Book, Boolean> getBookList () {new HashSet ();this .getBorrorList().forEach(borrow -> set.add(borrow.getBook_id()));try (SqlSession sqlsession = MybatisUtil.getSession()){new LinkedHashMap <>();BookMapper mapper = sqlsession.getMapper(BookMapper.class);return map;
添加书籍(doPost) 往常请求页面都是在Servlet-doGet中进行代码修改,之前再添加选择信息是也是传递的是英文字母为Value,添加书籍和学生都应该在doPost中进行代码修改,才能使前端页面传到服务器的值是正确的UTF-8(在项目代码编码中设置全局项目和本项目都是UTF-8)
1 2 3 4 5 6 7 8 9 10 11 12 13 14 15 @Override protected void doPost (HttpServletRequest req, HttpServletResponse resp) throws ServletException, IOException {"utf-8" );"utf-8" );"text/html;charset=utf-8" );String title = req.getParameter("title" );String desc = req.getParameter("desc" );double price = Double.parseDouble(req.getParameter("price" ));"books" );
“记住我”功能的实现 如果登陆成功,就把用户的信息扔给Cookie
(创建Cookie,添加Cookie,设置时间,进行重定向)
1 2 3 4 5 6 7 8 9 10 11 12 13 14 15 16 17 18 19 20 if (service.auth(username, password, req.getSession())) {if (remember != null ) {Cookie cookie_username = new Cookie ("username" , username);60 * 60 * 24 * 7 );Cookie cookie_password = new Cookie ("password" , password);60 * 60 * 24 * 7 );"index" );else {"login-failure" , new Object ());this .doGet(req, resp);
问题:退出时又自动登录
解决:原因是退出到主页时,原来的Cookie还在,所以会默认登陆。所以我们要在LogoutServlet操作中加入清除Cookie
1 2 3 4 5 6 7 8 Cookie cookie_username = new Cookie ("username" , "username" );0 );Cookie cookie_password = new Cookie ("password" , "password" );0 );
问题:项目中分别设置Cookie与Session,开始和结束两个操作的关系。
答:Session的作用时让注册过的用户可以访问所有的页面。Cookie的作用是让用户在下一次打开网页时可以直接免登录。
虽然说本地的服务器写一个“记住我”的功能没有大的必要,但是如果布置到网上,就会显得很有用,比如每次登录Github都会默认登陆。
Cookie和Session有相似点,可他们的功能互不干扰。